Back to Blog


Monica Jansen
Jul 14, 2026
How To Create an Email on My Domain via cPanel, aaPanel, and HestiaCP
Today, emails have a ubiquitous presence in everyday lives. That is especially true for those who run businesses and operate websites or any other types of online platforms.
Your AbeloHost subscription gives you access to a unique email server that you can use to create separate accounts and access them via a web-based email service. The following guide will help you get started if your control panel software of choice is one of the following:
Follow along to discover how to create and access your new email account.
How to Create an Email on My Domain via cPanel
In case you’re using cPanel, follow these steps to create an email.
Step 1
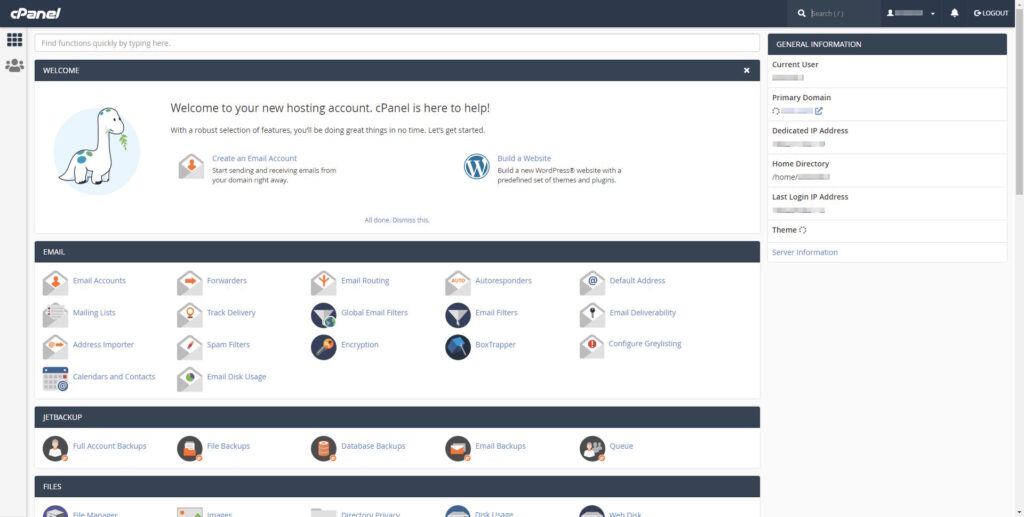
Firstly, log in to your cPanel account. On the homepage, click Email Accounts in the menu.
Step 2
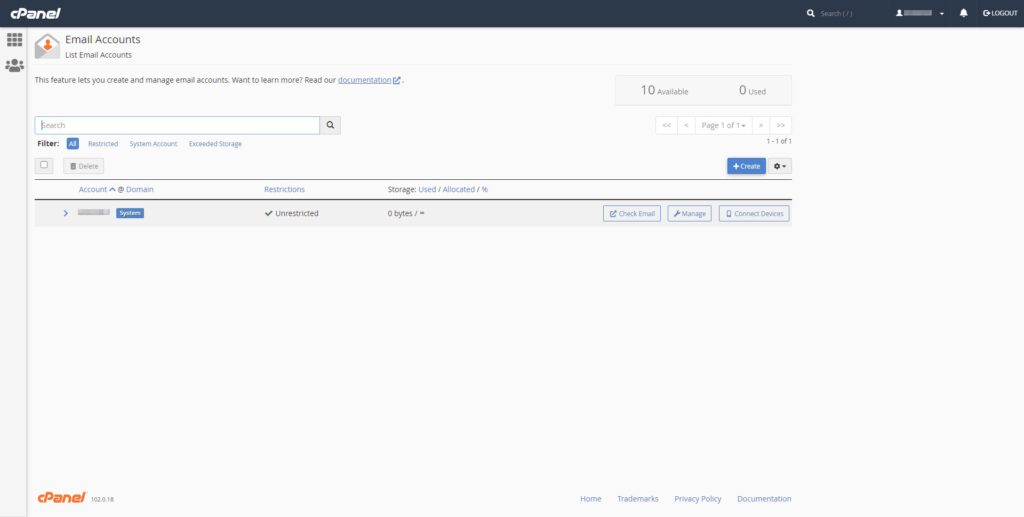
A new page will load. Select the blue Create button.
Step 3
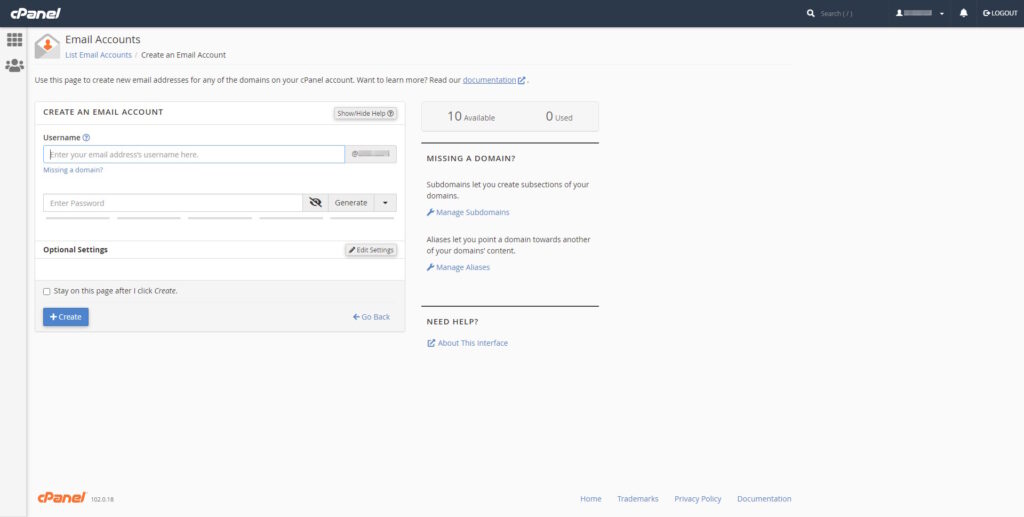
Now, type in your desired username in the relevant spot. Next, either come up with a password of your choosing or tap Generate to create a random option.
When you are done, click the blue Create button.
And that is all! As soon as you complete the final step, your new email account will be up and running.
How to Create an Email on My Domain via aaPanel
For all aaPanel users, creating an email is as simple as following the instructions outlined in the subsequent sections. We also have a guide on installing WordPress via aaPanel if you are just getting started.
Step 1
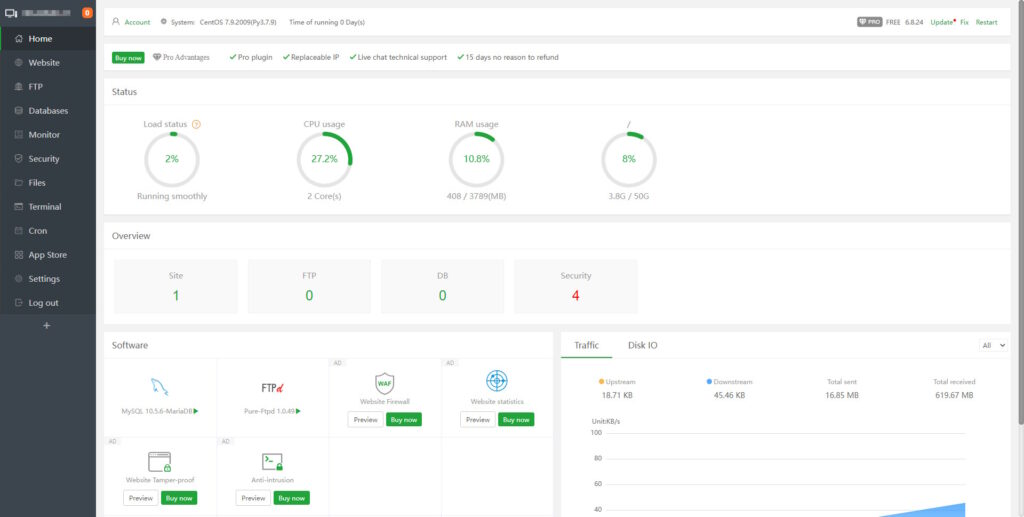
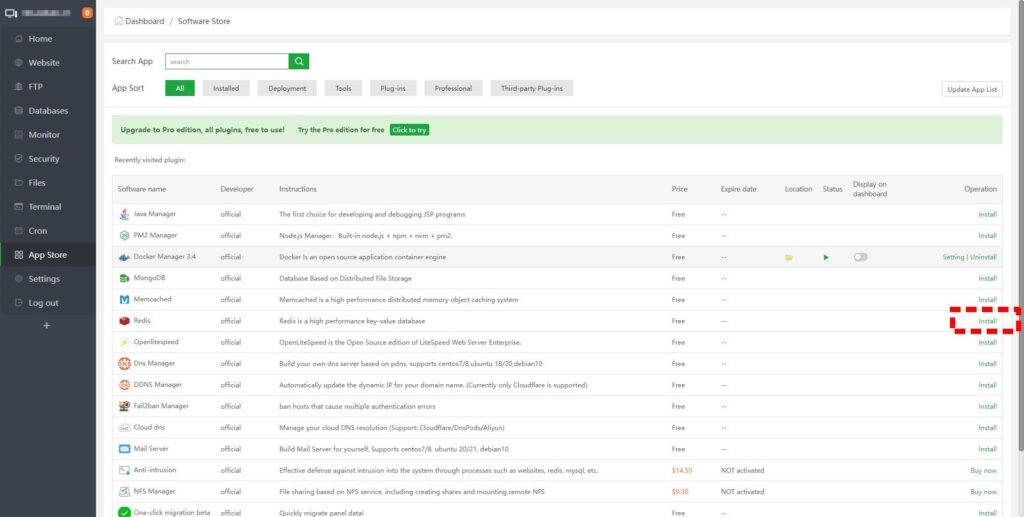
Log in to your aaPanel account and select the App Store section.
Step 2
Find Redis on the app list that loads, and select Install.
Step 3
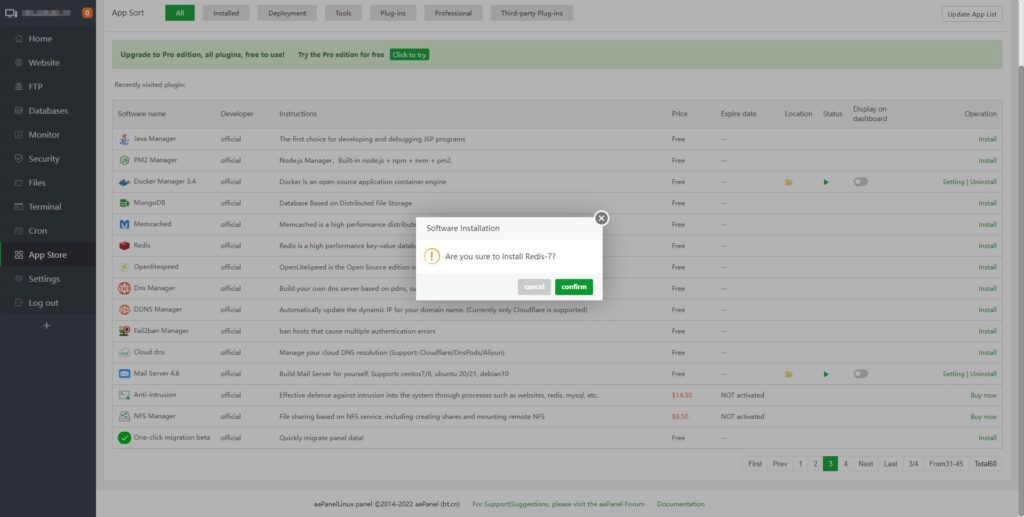
Click the green Confirm button.
Step 4
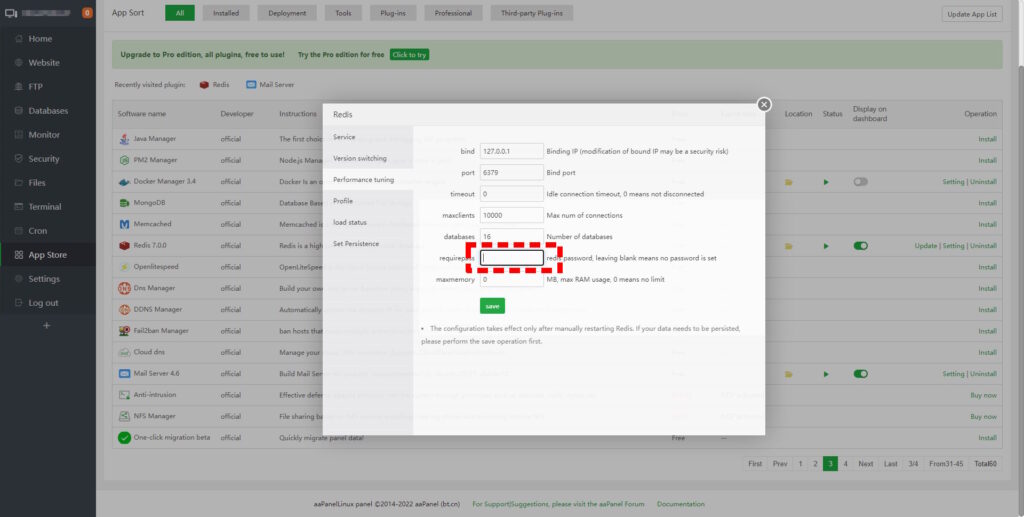
With Redis installed, you can now set it up. Head over to Settings, then select Performance Tuning. In the new pop-up that loads, set the requirepass (password), repeat it, and click Save once you are done.
Step 5
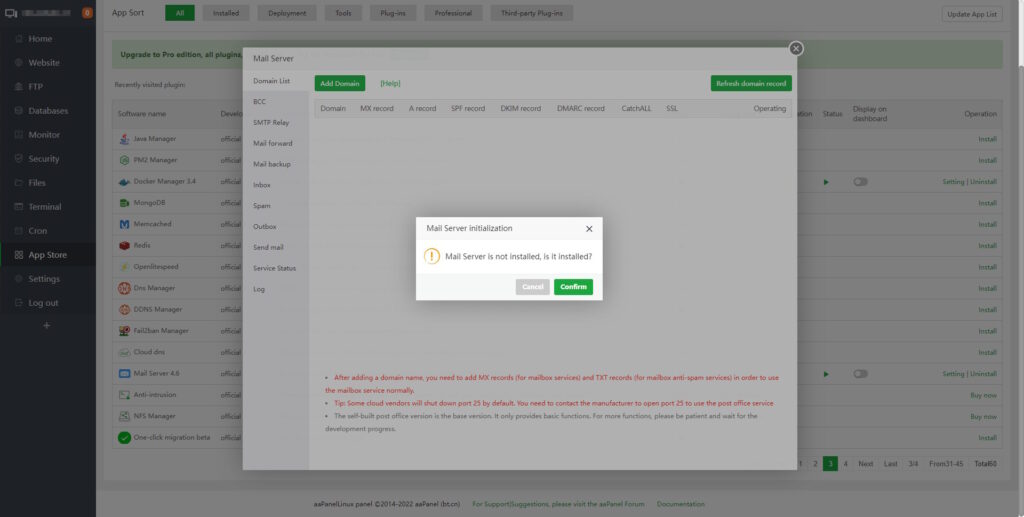
In the app menu, select Settings under Mail Server, and then the green Confirm button.
Step 6
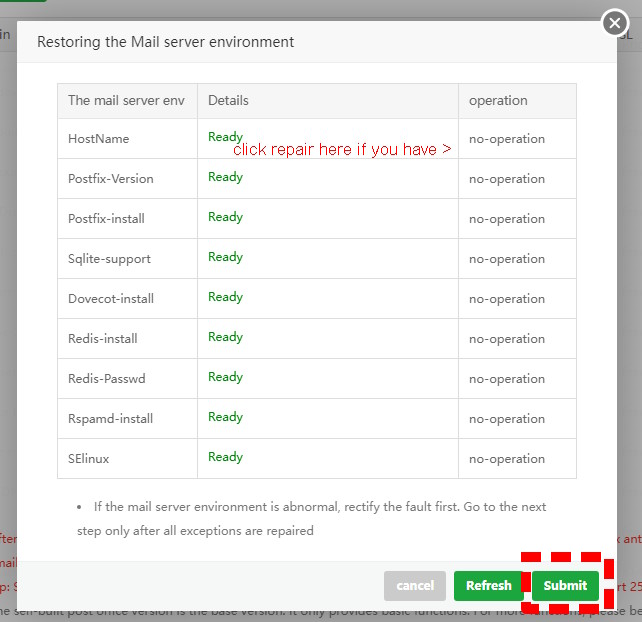
A new pop-up window will open. All the sections under Details should say Ready. In case there are issues with the HostName component, select Repair under Operation and set up the correct name. Once you are done, click Submit.
Step 7
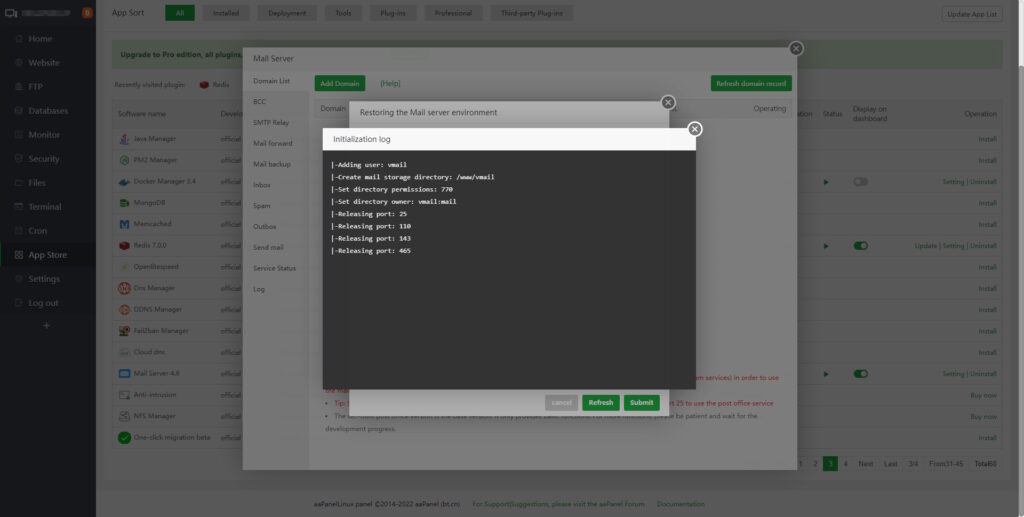
Wait for the process to complete.
Step 8
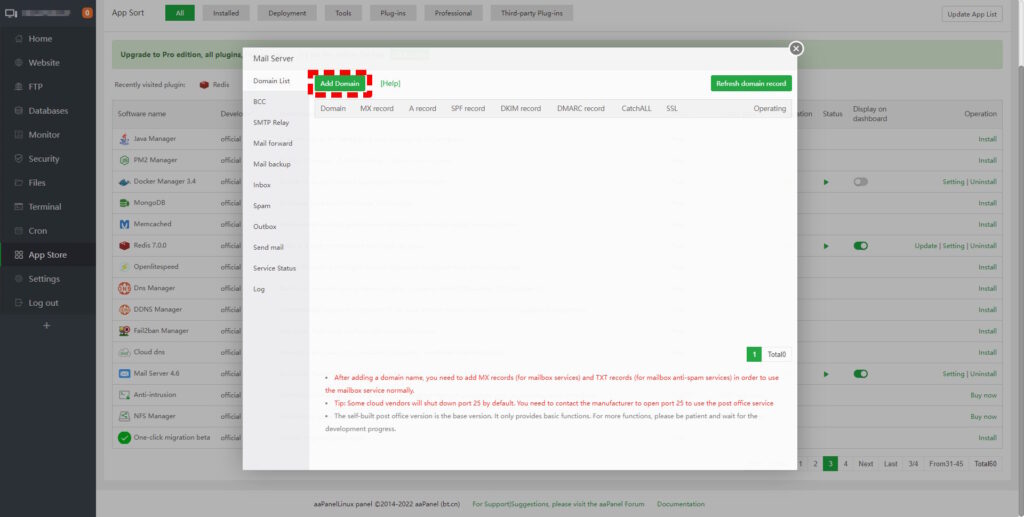
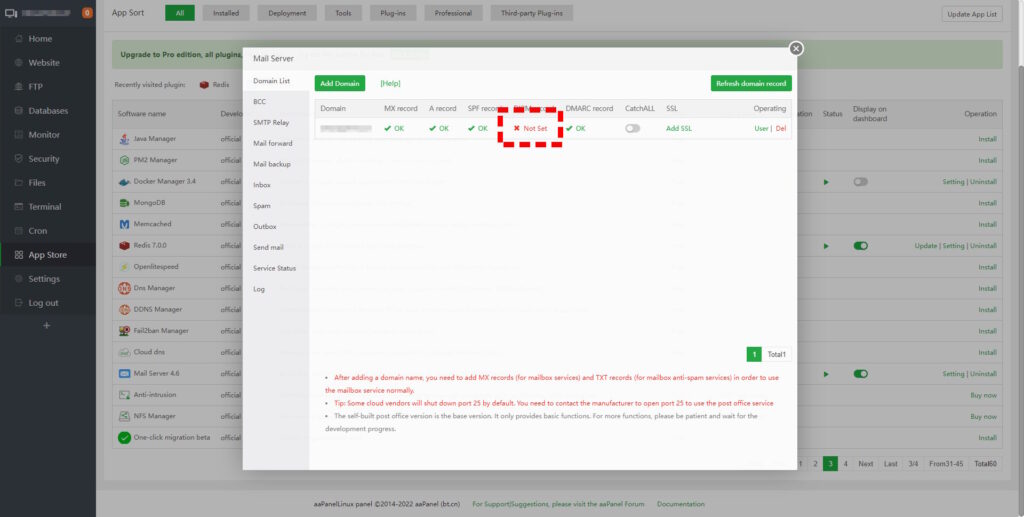
When it concludes, click the Add Domain button.
Step 9
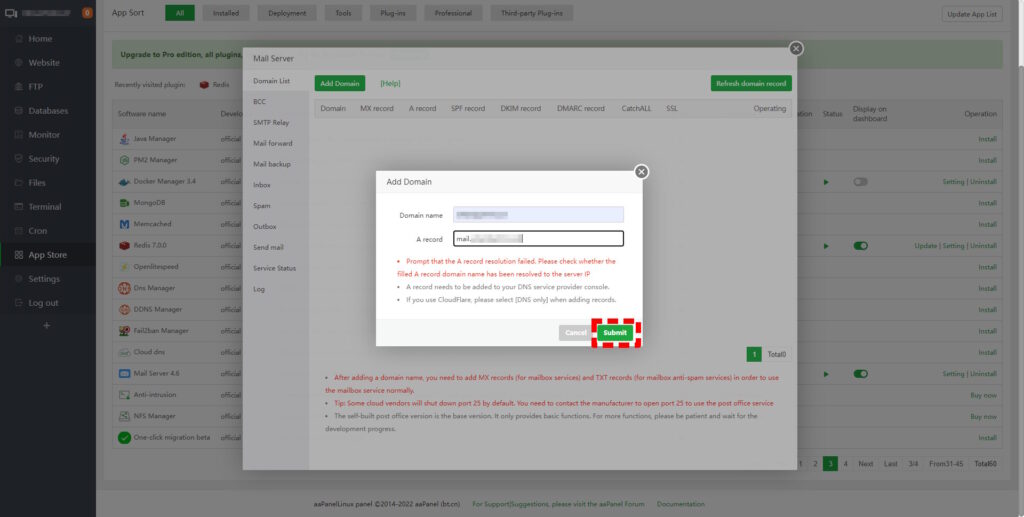
Now, input your A record for the mail server (mail.example.com) in the designated spot. Click Submit.
Step 10
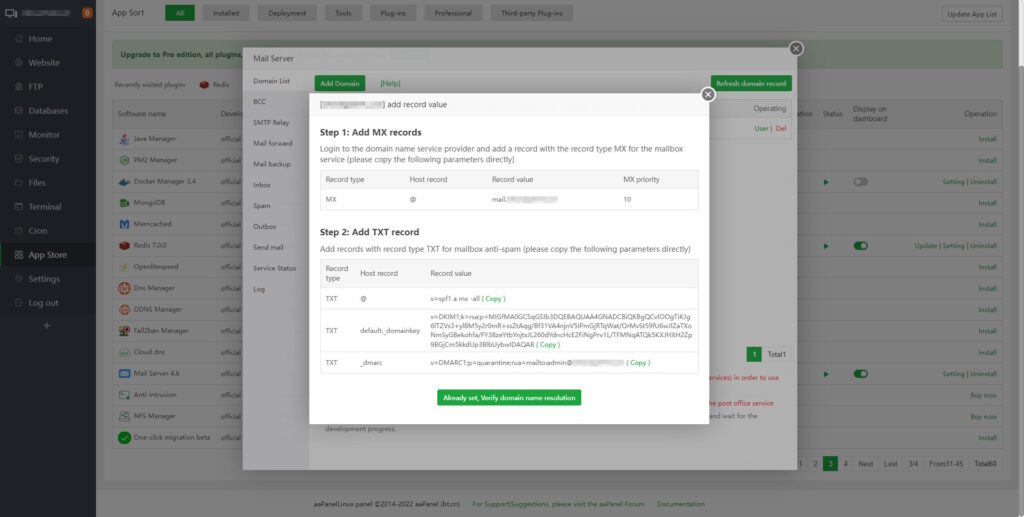
Next, you will see Not Set under DNS records — click on it.
Step 11
Now, log in to your Cloudflare account as indicated, and modify the DNS records for your domain.
Step 12
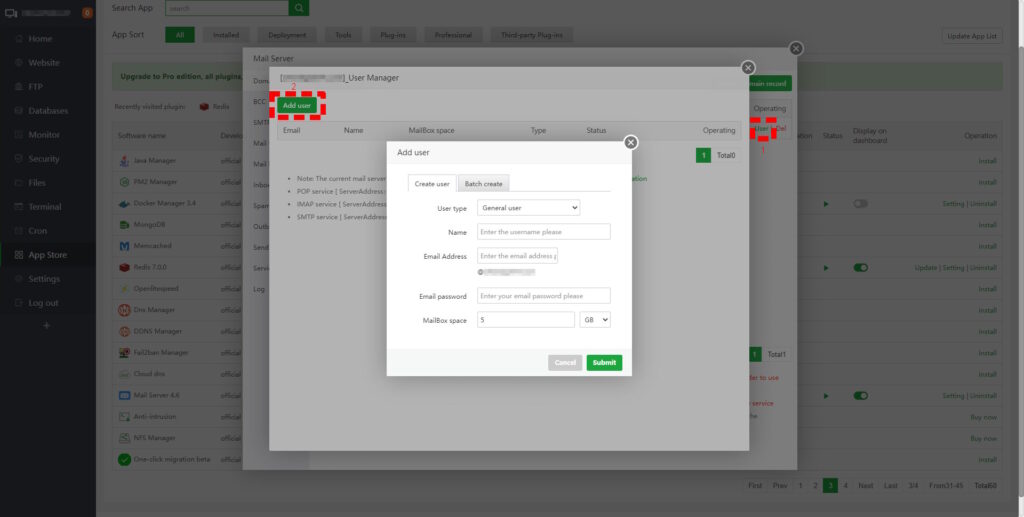
To the right of your domain name, you’ll see a User button. Click it, and then select the green Add User button in the new pop-up.
Step 13
Input your username and password in the designated slots, and click Submit.
How to Create an Email on My Domain via HestiaCP
And finally, HestiaCP users can utilize the following instructions to make a new email account. If you are new to this control panel, you can first check out our guide on installing WordPress via HestiaCP.
Step 1
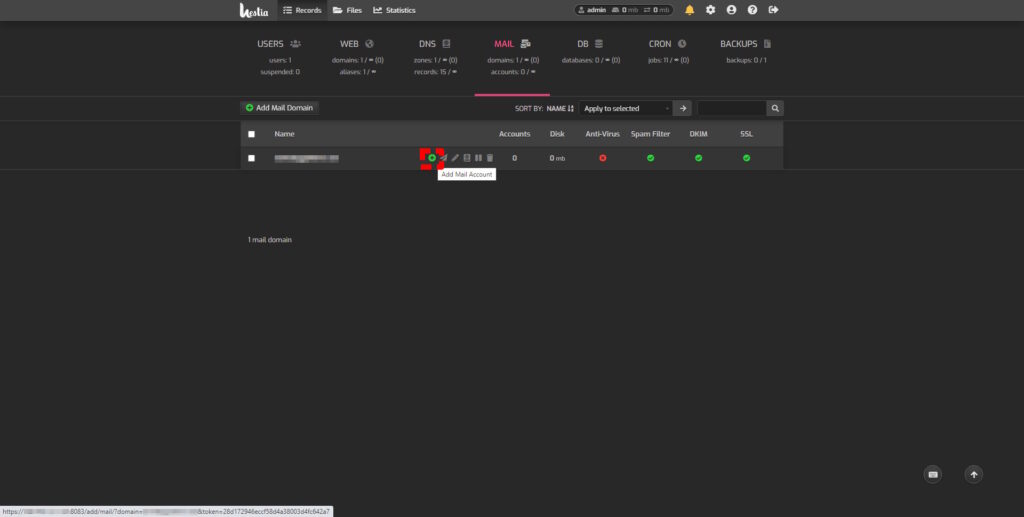
First, log in to your HestiaCP account and head over to the Mail section. Then, hover your cursor over your domain and click the + button that appears.
Step 2
Type in your Account name and Password. Click Save, and you will be all done.
In Case of Trouble…
If you encounter any issues while following the instructions above, feel free to contact our support team. They will help you get back on track and resolve any problems for you.
Conclusion
Regardless of which control panel you are using, creating an email on your domain is an easy process. By following our guides, you’ll be done in little time and ready to use your email right away.
Author
Monica Jansen
Monica Jansen is a seasoned tech writer focused on web hosting and cybersecurity. She loves doing deep dives and whittling down difficult topics into simple and succinct concepts. Whether she is covering firewalls or different hosting plans, she always strives to provide clear guides that website owners of all skill levels can follow.
Add your comment
Get content delivered straight to your inbox



Your data.
Your choice.
Work with the best of the best — your projects deserve it.