Back to Blog


Monica Jansen
Jul 13, 2026
How To Install WordPress via HestiaCP: Step-By-Step Guide
At present time, more than 40% of all websites in the world are powered by WordPress. To put things into perspective, this percentage translates into around 835 million sites.
Needless to say, WordPress is the software to use if you want to run a successful website without spending all your time on creating and maintaining it. It’s quick, easy, and affordable.
If you’re thinking of joining this vast array of WordPress users — and you use HestiaCP — read on. Below, we will go over every step of the installation process in detail to help you get started.
Here is what you can expect from the guide:
Let’s begin!
Explaining WordPress
WordPress is an open-source content management system that helps you easily manage your website without much coding knowledge. Put simply, it ensures that virtually anyone can build a site, regardless of their experience and skill set.
At first, WordPress was used solely for making and running blogs. However, thanks to significant coding changes, it supports all website types, from forums to e-commerce stores.
Now, the main advantage of WordPress, and a fact that has made it so ubiquitous, is that it is free. Namely, while you do need to pay for web hosting for your site, the software itself comes at no cost.
Additionally, WordPress is so commonly used because it is highly extensible. It has an extensive ecosystem of plugins and themes that allow you to modify your site in any way you want.
Thus, it is no surprise that some of the largest companies in the world — including Microsoft — are using WordPress for their official websites.
How Do You Install WordPress?
Another reason for WordPress’ popularity is that it is incredibly easy to install. Many choose to download the software and integrate it into their hosting plan themselves.
It takes some skill and time, but WordPress expertly outlines all the steps on its website.
However, you should also note that the vast majority of hosting providers offer to install everything for you, ensuring you have little to no work to do.
Alternatively, many of them equip you with various tools that ensure the installation process is smooth even for non-developers. In any case, you can set off on your website journey within minutes.
Therefore, the latter is significantly less time-consuming and overall taxing. In addition, it gives you a lot of freedom for modifying and improving your website with time.
Installing WordPress in HestiaCP
At AbeloHost, we ensure all users who want a WordPress website can do so in little time. If you are a new user, follow along as we break down the entire installation process in HestiaCP.
Deploying Our VPS
The first step of installing the WordPress software is deploying our VPS. Essentially, we have to create some virtual space for your new website. Here is how you can initiate it.
Step 1
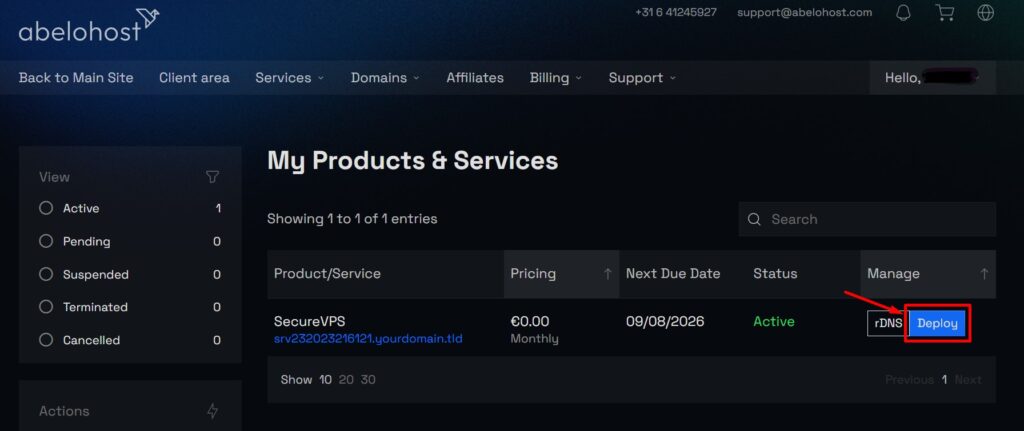
Log in to your Abelo account and head to the Services tab. On the page, click on Deploy, as indicated here:
Step 2
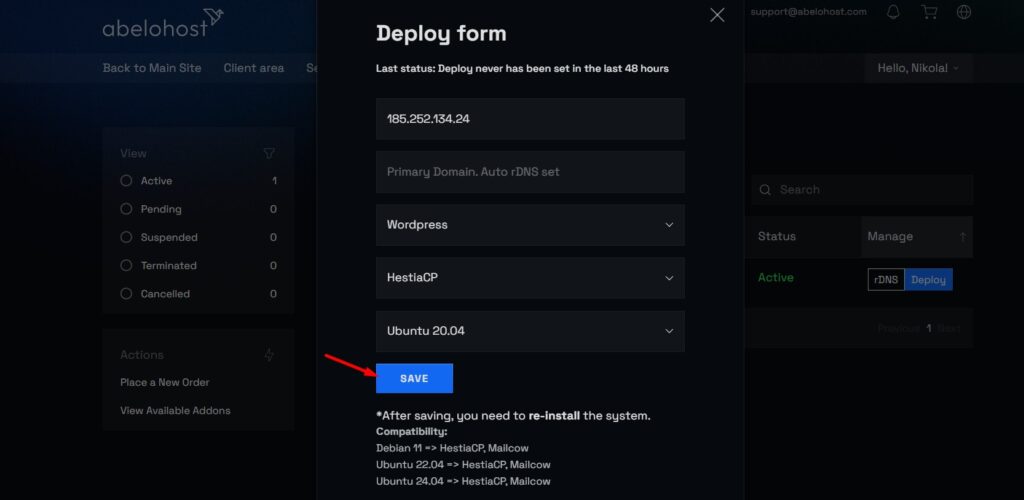
A new page will pop up, titled Deploy form. Type in your domain, as indicated in the image below. Moreover, choose HestiaCP and Ubuntu 20.04 as your primary CP and OS.
Step 3
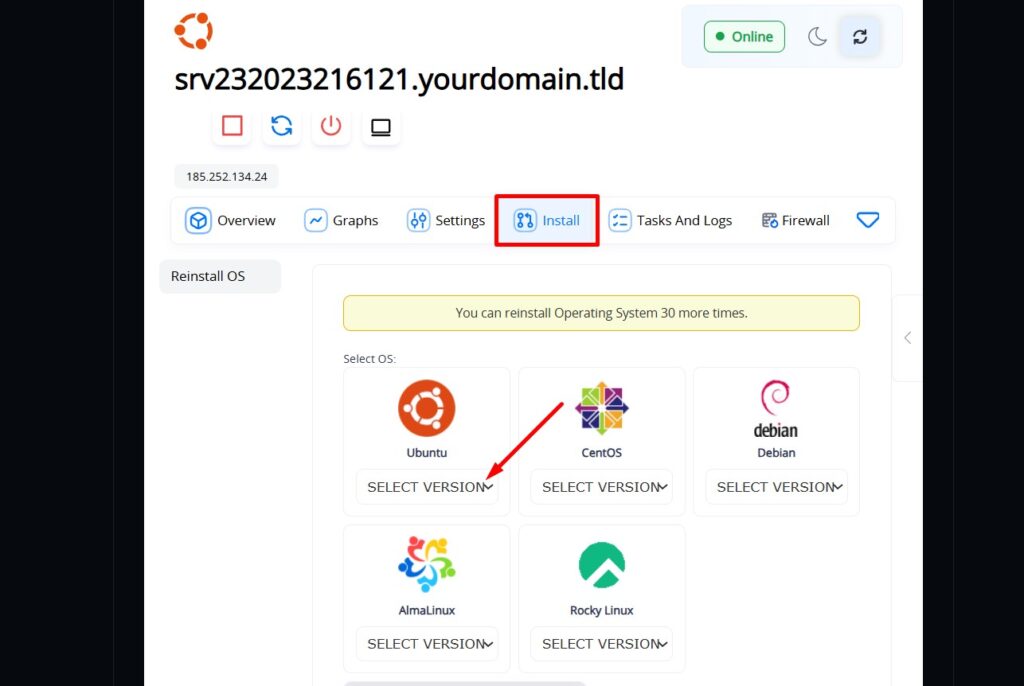
Your next step is reinstalling your OS. You can do it by heading back to your Services, scrolling down to the VPS management menu, and selecting Install and choosing Ubuntu 20.04-x86_64.
Step 4
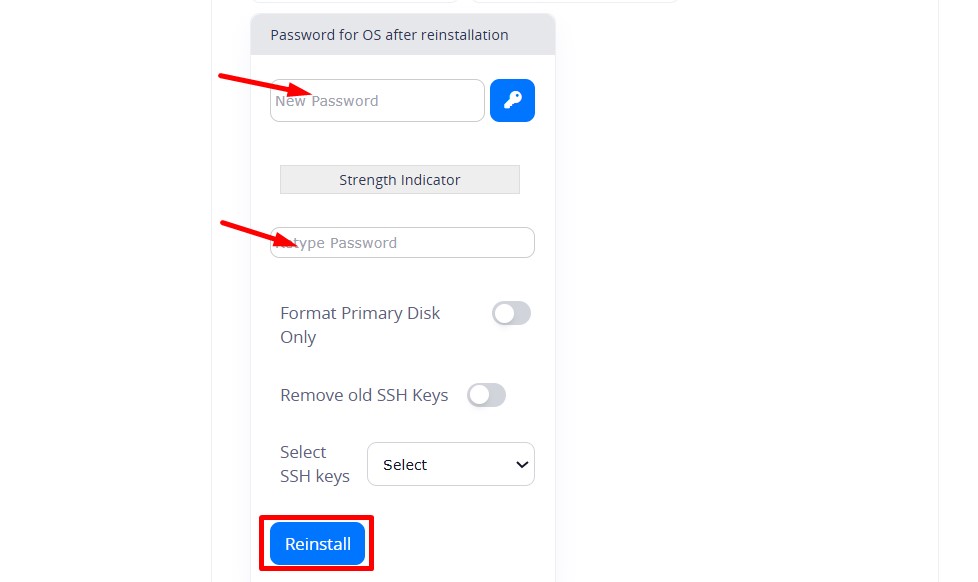
You should then scroll further down and come up with a password, retype it, and select Reinstall.
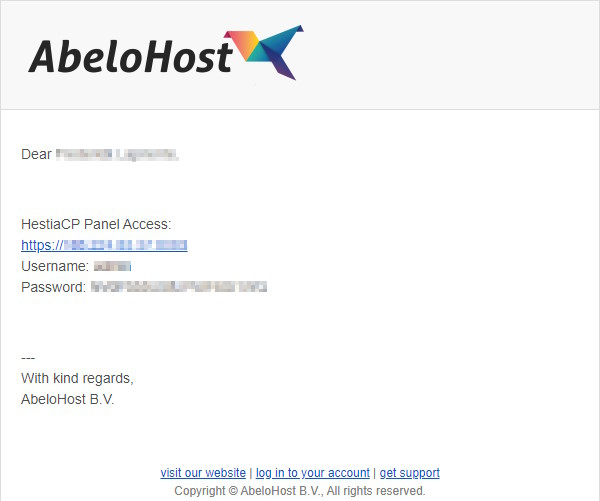
After the reinstallation process is complete and the VPS is deployed, you should receive an email containing login details for HestiaCP. It should look like the following picture:
Creating an SSL Certificate
Now, it is time to focus on securing your website before installing WordPress.
Step 1
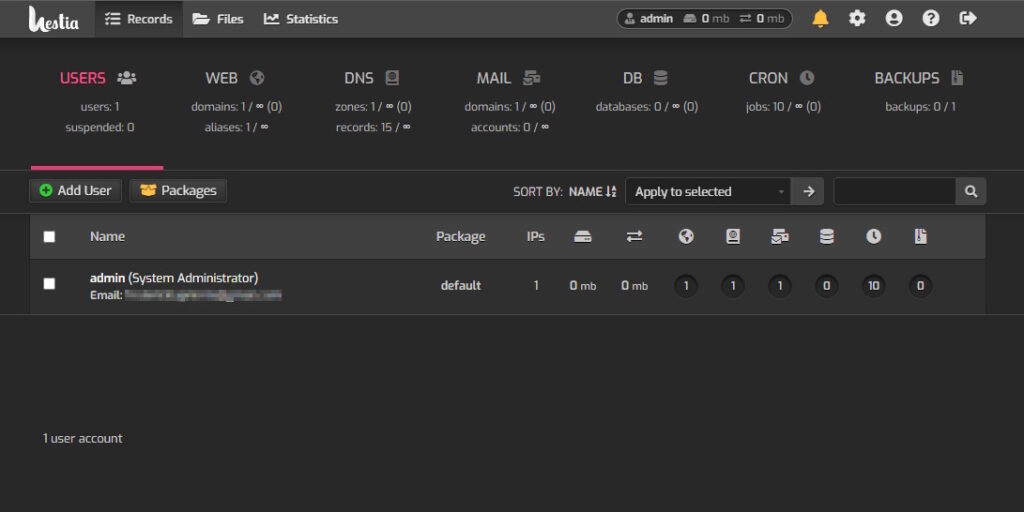
Click on the link granting you access to the HestiaCP Panel (included in the aforementioned email). Log in using the surname and password from the same email.
Once you do, you will be able to see the main page.
Step 2
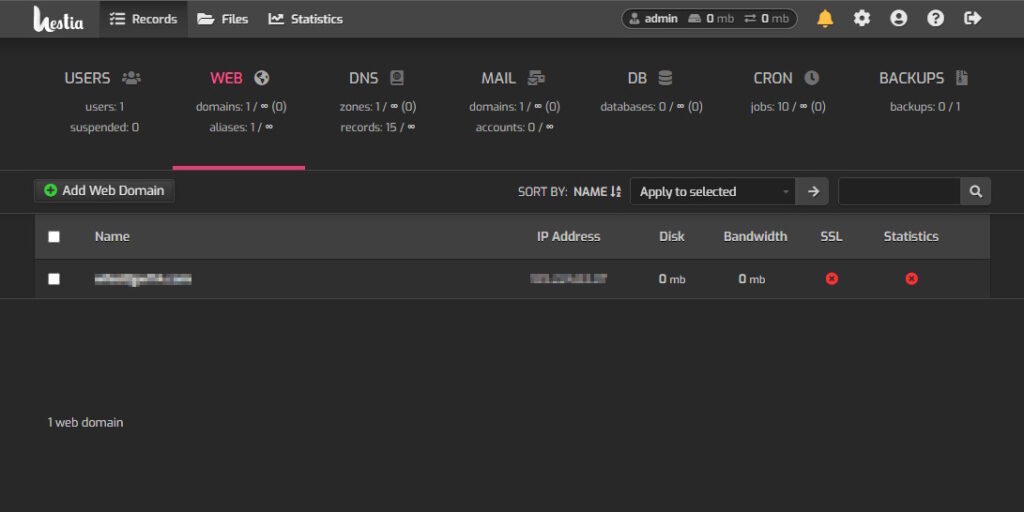
Go to the Web tab.
Step 3
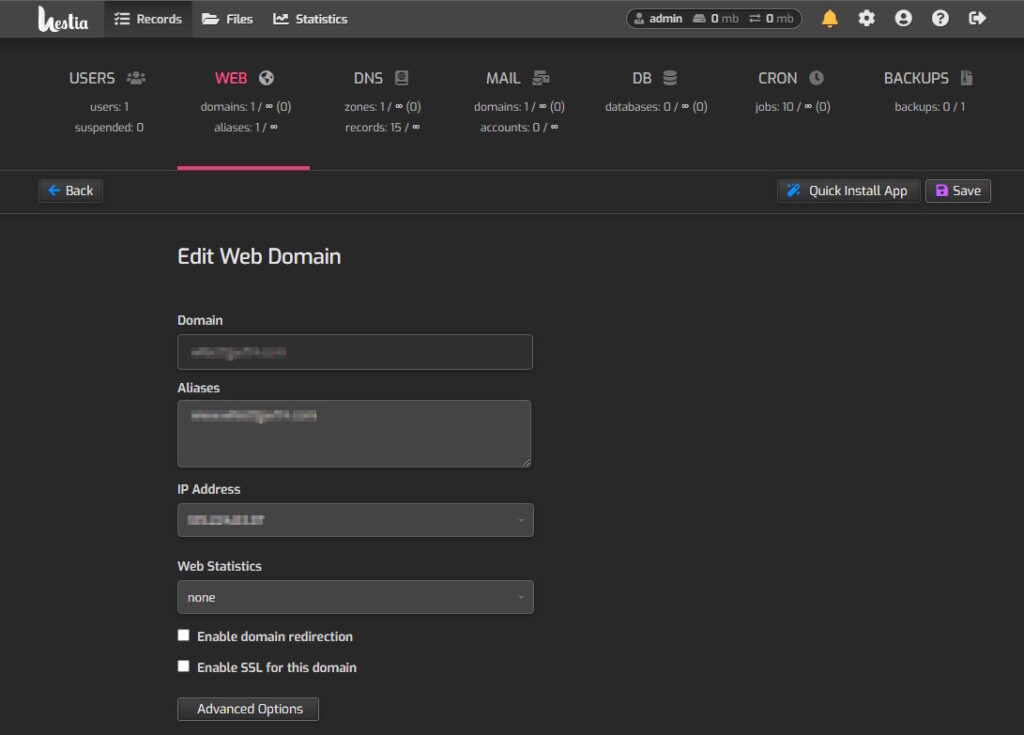
Hover your cursor over your domain. After a second, a pencil button should appear. Click on it, as it’ll allow you to edit the domain in question.
This is the page that will open:
Step 4
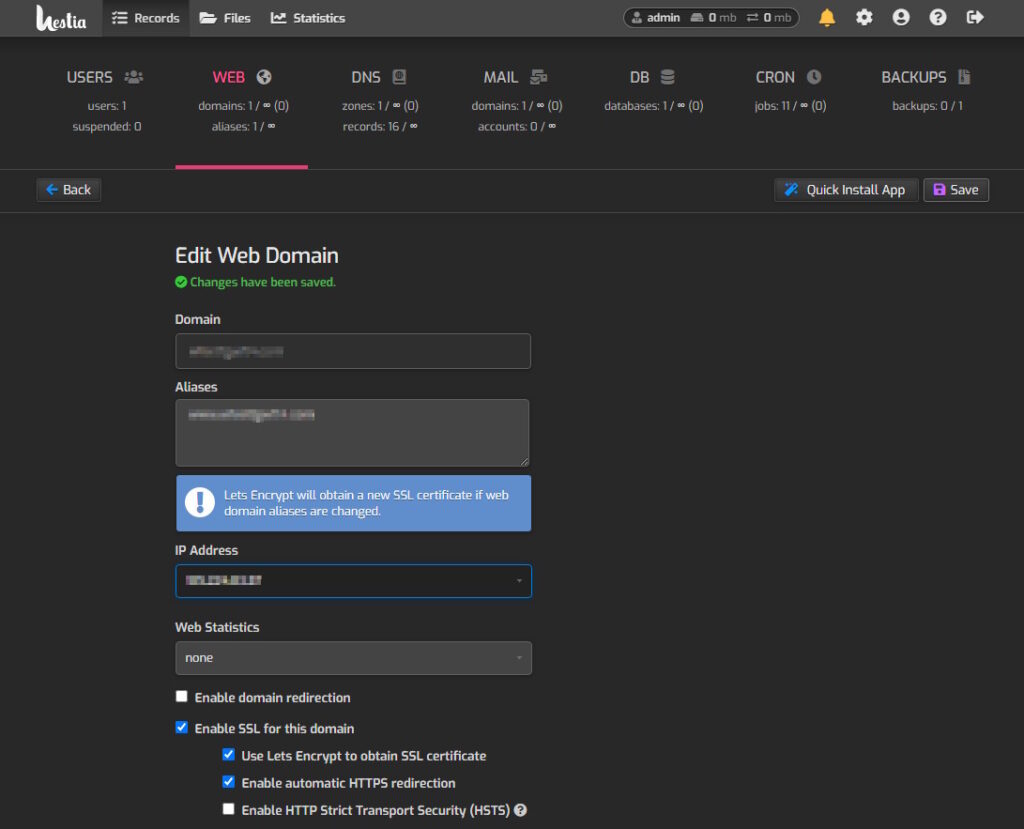
First, check the box next to Enable SSL for this domain. From the options that appear below, check Use Let's Encrypt to obtain an SSL certificate and Enable automatic HTTPS redirection.
This is what the page should look like before you click Save.
Installing WordPress
And finally, the last piece of the puzzle — here is how to install WordPress in HestiaCP.
Step 1
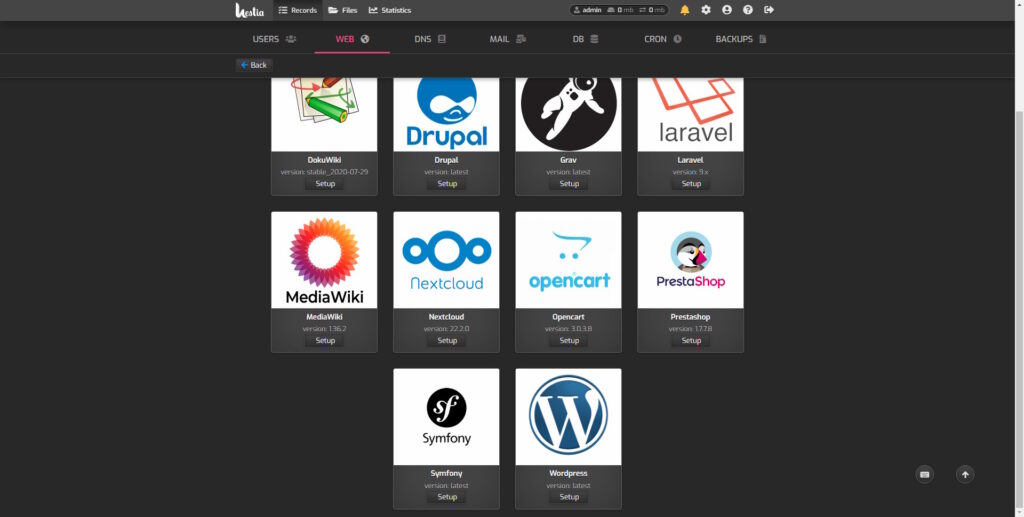
Go back to the Web section, click on your domain name, and tap the Quick Install button in the top-right corner.
Scroll a bit until you see the WordPress icon with all the software options. Click on Setup right beneath it.
Step 2
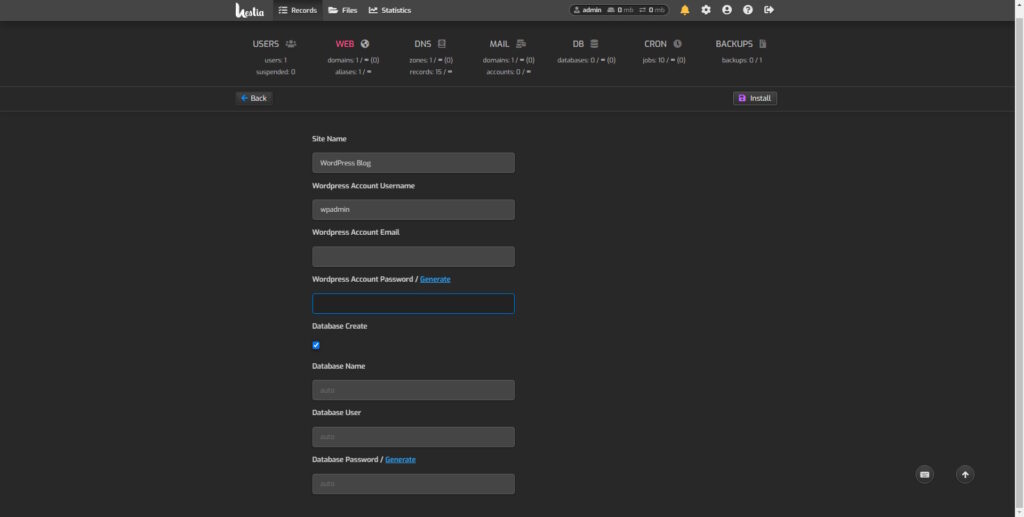
Now, you’ll have to come up with a username and password combination. Alternatively, you can also create them via the Generate button.
In addition, you can edit any other relevant settings on the page. When you are done, click Install.
Step 3
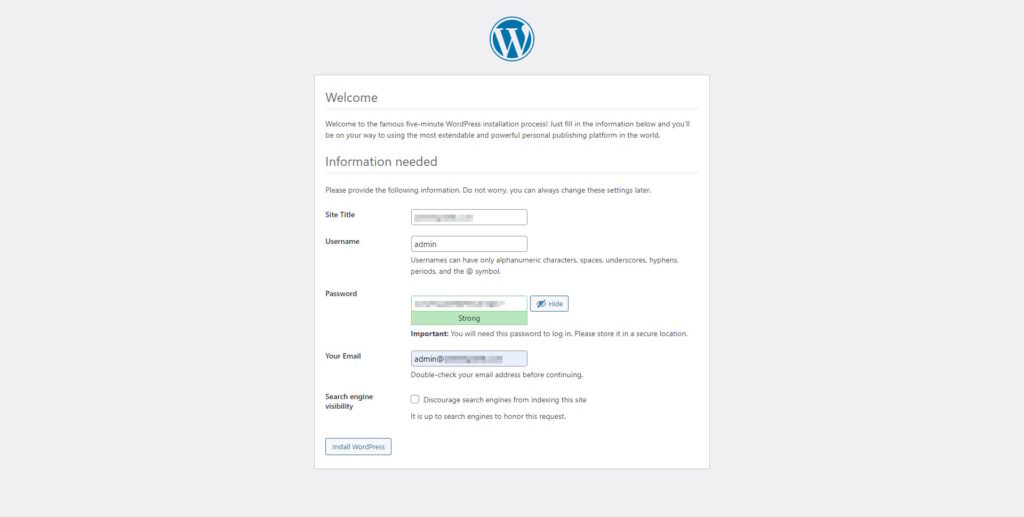
Lastly, head to https://yourdomainname/ and complete the process by inputting all the required information and clicking on Install WordPress.
And that is all. Your WordPress-powered website should be up shortly. In case you run into any potential issues or have trouble completing the steps, your hosting provider will be able to offer any necessary assistance.
Conclusion
As you have seen, installing WordPress in HestiaCP is a relatively effortless process. Simply follow the steps outlined above, and your website should be up and running in no time.
We also have guides on setting up an email and creating a subdomain in HestiaCP for those who want to learn more.
Author
Monica Jansen
Monica Jansen is a seasoned tech writer focused on web hosting and cybersecurity. She loves doing deep dives and whittling down difficult topics into simple and succinct concepts. Whether she is covering firewalls or different hosting plans, she always strives to provide clear guides that website owners of all skill levels can follow.
Add your comment
Get content delivered straight to your inbox



Your data.
Your choice.
Work with the best of the best — your projects deserve it.