Back to Blog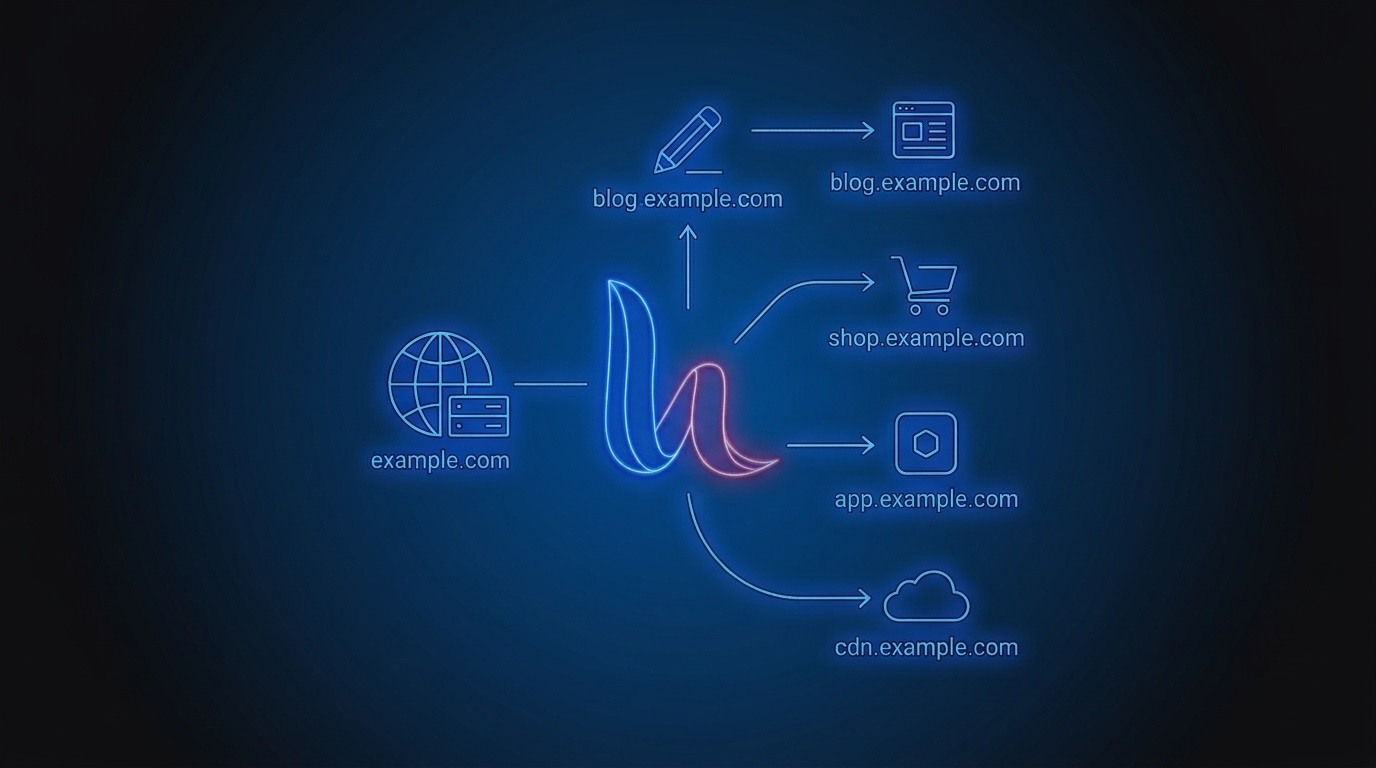



Monica Jansen
Jul 23, 2026
How to Create and Delete Subdomains in HestiaCP
Subdomains are a key tool for organizing your online space and offering visitors a well-structured website. If you want to know how to create and delete subdomains in HestiaCP, look no further.
To assist you with this task, we’ll cover the following points:
- What are subdomains?
- When is using subdomains a good idea?
- How to create subdomains in HestiaCP
- How to delete subdomains in HestiaCP
Keep reading to learn the specifics.
What are Subdomains?
In simple terms, subdomains are extensions of your main domain, and by creating one, you’re adding a standalone unit to your website.
For instance, many businesses build subdomains for help centers, blog sections, or merchandise stores. Additionally, companies operating in several countries typically utilize them to offer content tailored to different locations.
Generally speaking, subdomains are exceptional organizational tools, helping you shape your online space to suit your preferences as well as the needs of your visitors. They are particularly beneficial for large and complex websites, providing simplified navigation.
Furthermore, subdomains may enhance SEO by categorizing content into clearly defined areas, improving user experience and site relevance for specific topics.
Subdomains vs Subdirectories
Now, it’s important not to confuse subdomains with subdirectories. The two may seem similar since both allow you to arrange content into categories.
However, subdirectories aren’t independent sections; they are hierarchically structured folders within the main section of a website. In addition, subdomains often have their own subdirectories.
The distinction becomes clear once you look at URLs. For instance, imagine that you want to add a blog section to an online bookstore, and your domain name is mybookshop.com
One way to achieve that is to create the blog as a subdirectory within your main domain. In that case, the URL may look like this: mybookshop.com/blog
Alternatively, you could create a new subdomain. Then, the URL to your blog might be: blog.mybookshop.com
Finally, subdomains may be hosted on servers separate from the main domain, which is impossible with subdirectories.
When Is Using Subdomains a Good Idea?
As mentioned earlier, you can use subdomains to create a blog section, a help center, and more. Still, many websites keep these features as subdirectories within their main domain.
Although there are no clear rules or guidelines, adding a subdomain is generally a good idea if you’re:
- Adding a comprehensive help center – If a FAQ page can't answer all the customers' questions, a dedicated section that provides detailed information about your service or product may provide a better experience
- Expanding internationally – If you’re targeting an audience in a new country, a subdomain can help you offer content tailored to that location
- Creating a blog – In particular, if the topics and keywords on your blog are not closely related to your main site, adding a standalone section is a good idea
- Opening a merchandise store – A subdomain allows you to run and profit from a merchandise store while keeping it separate from your main content
- Running tests – You can use subdomains to test pages of your website and fix any existing issues before going live
- Reaching new customers – If you're targeting a new audience, a subdomain will help you create a distinct platform with appropriate branding
Ultimately, the specifics of your website and your business goals will dictate whether you should add subdomains and for what purpose. Nevertheless, if you’re running an online business, you need to know how to perform this task, which leads us to the next section of this guide.
How to Create Subdomains in HestiaCP
Take the following steps to add a new subdomain to your website.
Step 1
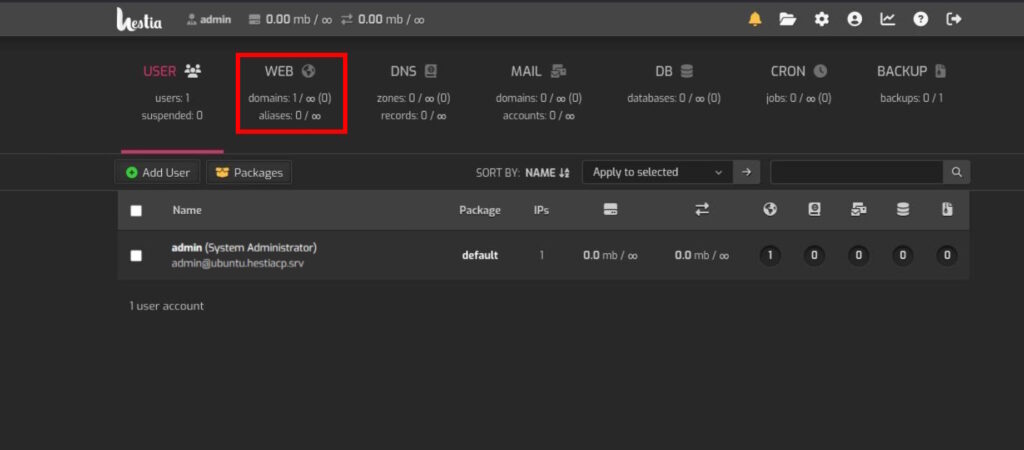
First, log into HestiaCP and select the WEB tab.
Step 2
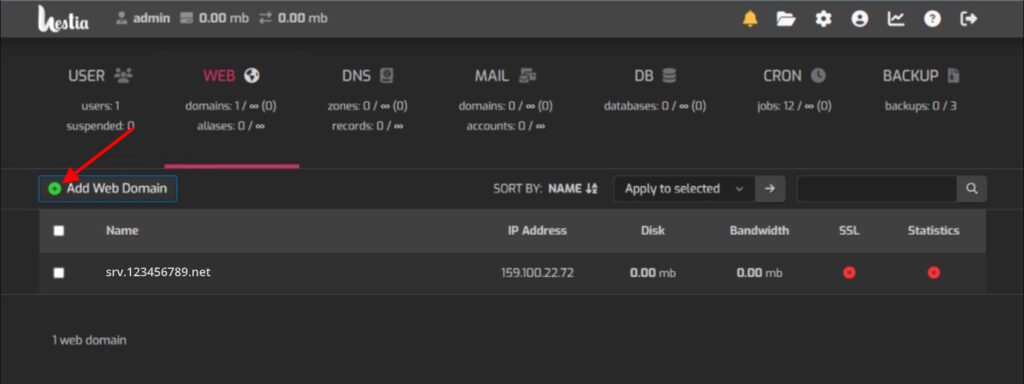
Next, click on the Add Web Domain button.
Step 3
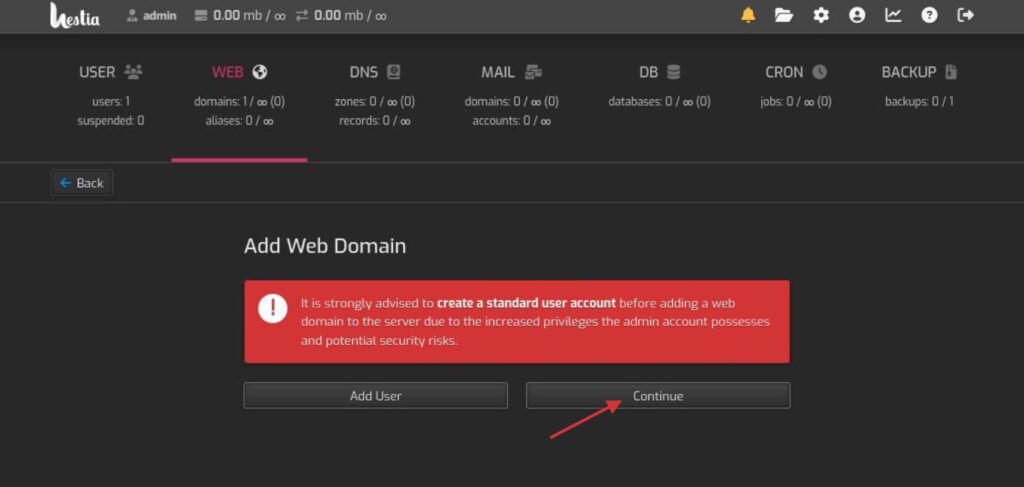
If the message from this picture pops up, press Continue.
Step 4
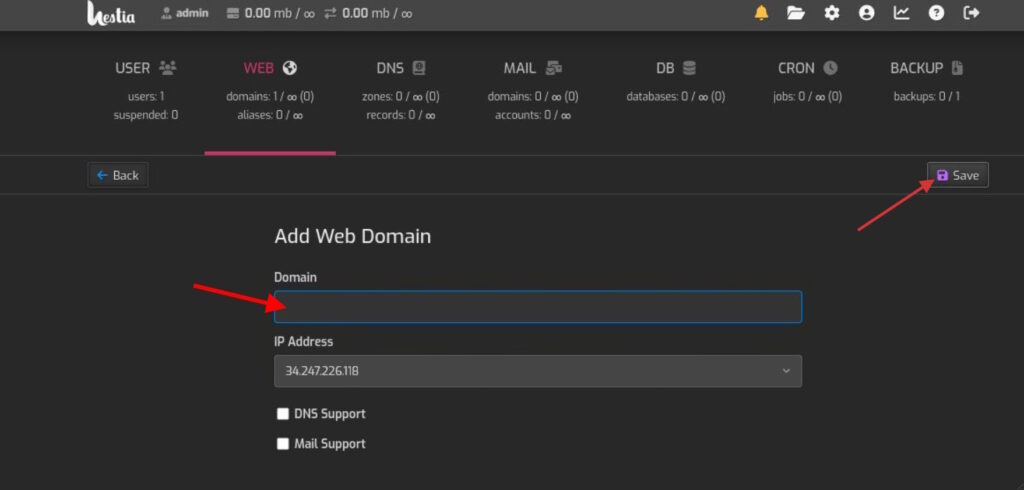
Type your subdomain name into the Domain field. For instance: blog.mywebsite.com
Step 5
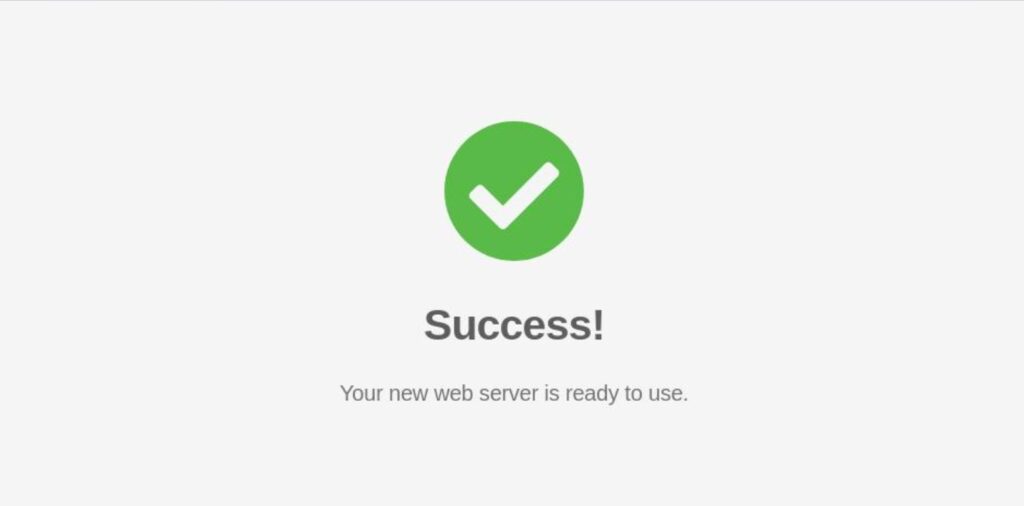
Then, click the Save button, and you should see a green alert notifying you that you’ve successfully created your subdomain.
Step 6
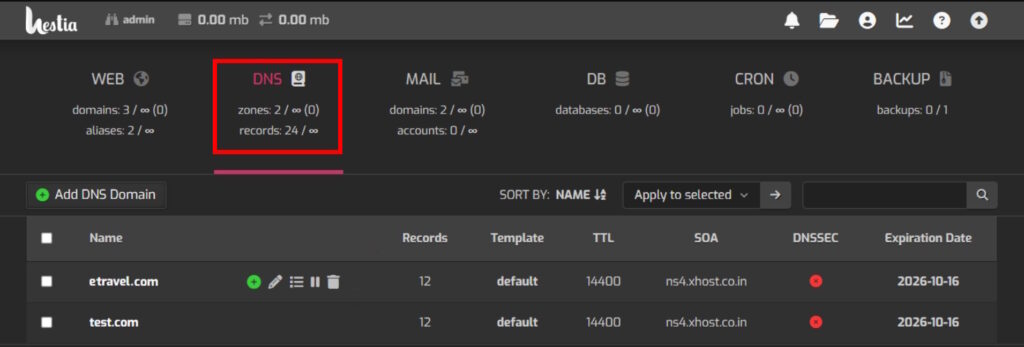
With that done, navigate to the DNS section, which you’ll find next to the WEB tab.
Step 7
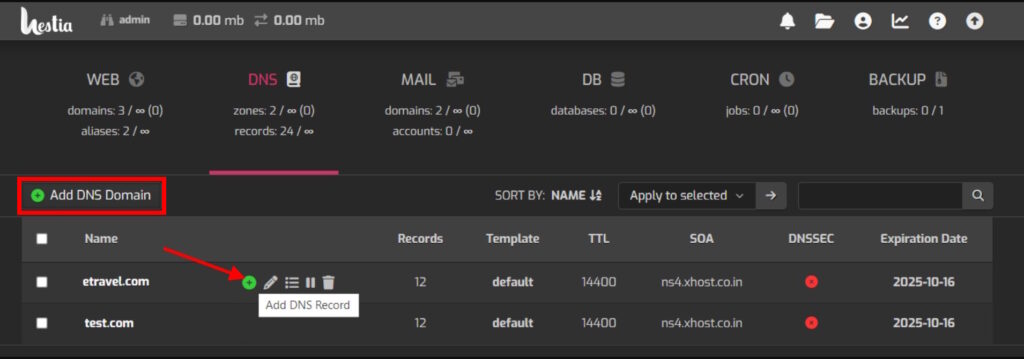
Hover your mouse over your domain name and click on the DNS Records icon, as shown in the picture below. From there, press the Add DNS Record button.
Step 8
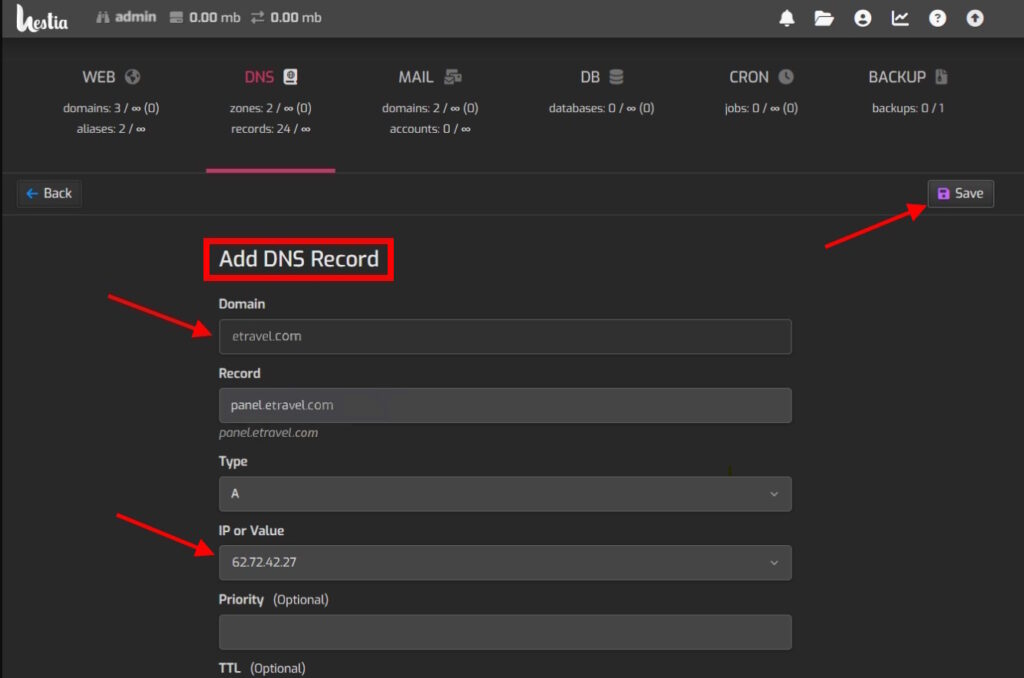
Next, type your subdomain into the Records field, then choose the IP address of your hosting plan from the drop-down list.
Finally, click on the Save button, and you’re all set. Still, bear in mind that it may take several hours for the change to DNS records to take effect.
Once everything is done, you can test access to your new subdomain by typing the URL into your web browser.
How to Delete Subdomains on HestiaCP
When it comes to removing your subdomains, the process is quite straightforward.
Step 1
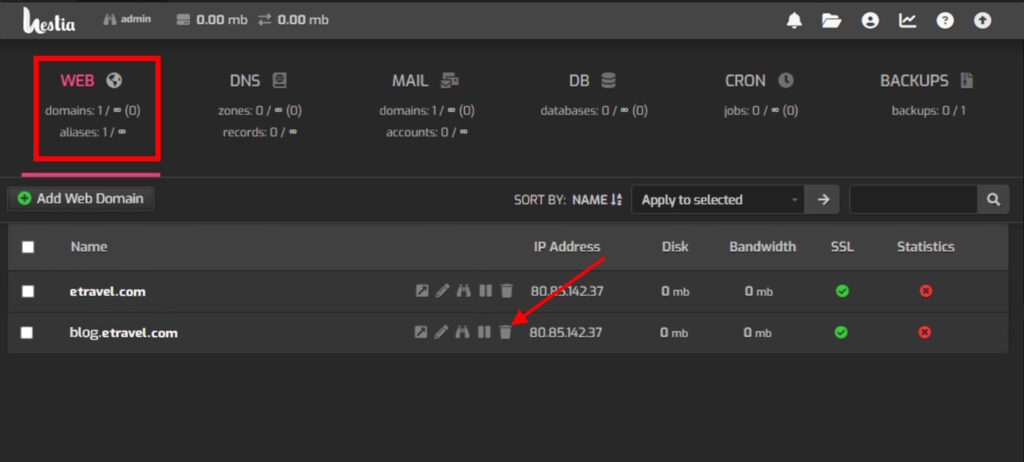
After logging into the control panel, navigate to the WEB tab. Then, hover over the subdomain you wish to delete and select the Trash icon.
Step 2
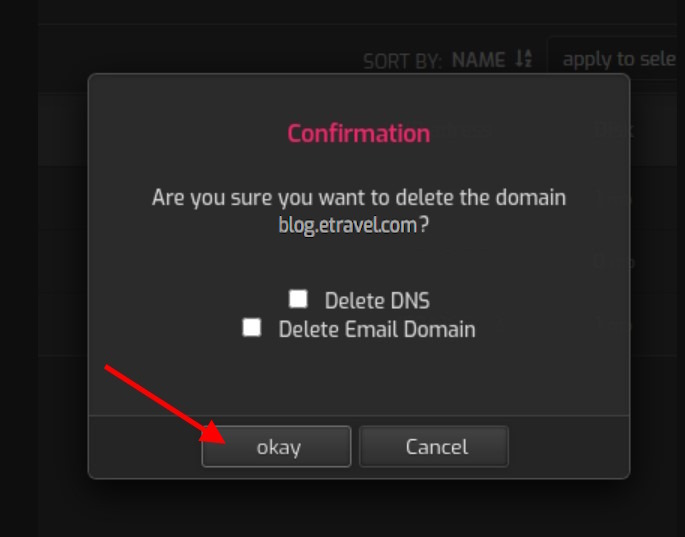
With that done, you’ll be asked to confirm your action. To complete the process, choose OK, and the subdomain will be deleted.
Conclusion
Whenever you wish to create and delete subdomains in HestiaCP, you can do so with a handful of clicks by following the steps from this guide. We also have a guide for aaPanel users, as well as more useful information on how to install WordPress using HestiaCP.
Ultimately, subdomains are a simple yet powerful way to keep your online space tidy and functional. Use them to achieve your business goals by enhancing user experience and giving visitors a reason to keep returning to your website.
Author
Monica Jansen
Monica Jansen is a seasoned tech writer focused on web hosting and cybersecurity. She loves doing deep dives and whittling down difficult topics into simple and succinct concepts. Whether she is covering firewalls or different hosting plans, she always strives to provide clear guides that website owners of all skill levels can follow.
Add your comment
Get content delivered straight to your inbox



Your data.
Your choice.
Work with the best of the best — your projects deserve it.